Machine Learning —The conjuring code Episode #1
Artificial intelligence and its impact is no more a far-fetched dream but an absolute reality, we are already witnessing many wonders of…

Artificial intelligence and its impact is no more a far-fetched dream but an absolute reality, we are already witnessing many wonders of the future that is about to come.
As has been the history of programming, we have seen many major paradigm shifts in the area of focus. Be it the shift from procedural to OOPS or from desktop to web and then to mobile first. And now as the tech giants are calling it AI first era.
Artificial Intelligence is not a new philosophy and has its root as back as World War II but what has given it sudden wings is the tremendous advancement in computational power, courtesy — nano-sized powerful hardware.
Without further ado, I will talk about the purpose of this blog and my intentions behind it. Though I was always amazed and awestruck by the possibilities of what AI can do, I only experimented a bit with AI during my college days. I started my career with normal web development, went further ahead and took a full circle to finally come back to AI. Coming from web/mobile development you may feel a starting friction like I did and that is not much because of the code, it still is done in a programming language, but the friction lies in the way we have trained our brain while doing years of web development. I read a lot to get started but from my experience, it’s all talk until you write the code. Not denying that this also requires a lot of mathematical and logical understanding but nothing is better than coding along with reading about ML.
It’s all talk until you write the code
In this series, I will write about basics of machine learning to get started so that it can help someone who stumbles upon the same stair as I did. It is a work in progress and I will keep updating. I will try to put in more code examples and less text to actually understand ML and not just talk about it
Before getting started with Machine Learning let’s talk a bit about AI.
Alan Turing stated that if a user and a machine have a conversation separated by a wall and if the user is not able to tell a machine from a human that machine would be said to be Artificially Intelligent
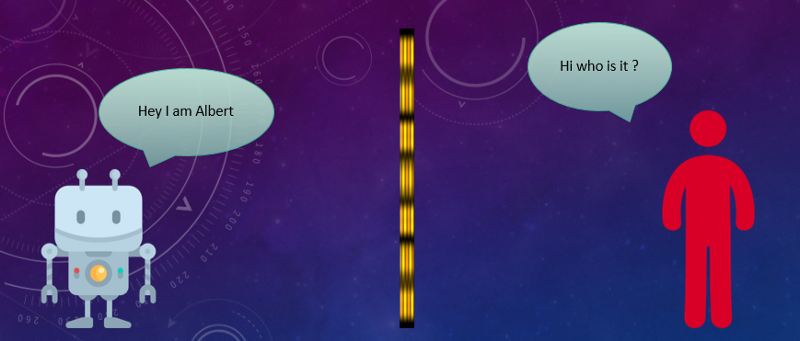
Artificial Intelligence is a quest to make machines intelligent like us and so everything that makes us human is inspiration for one or the other field of Artificial Intelligence and so Machine learning is a part of AI which is inspired by human’s ability to learn and the idea is to mimic the human brain
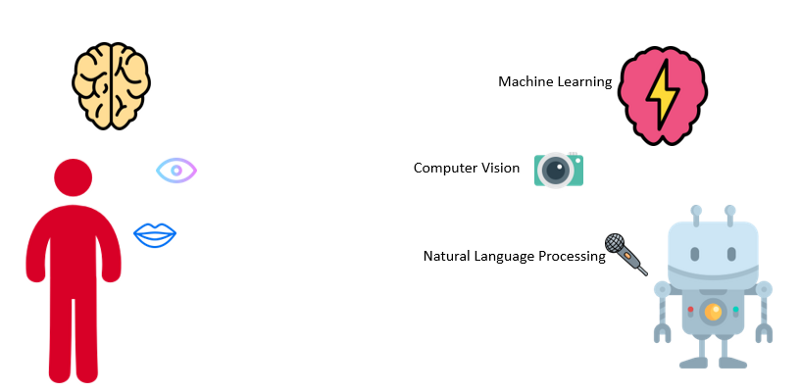
Now let’s start with the hello world for machine learning
Problem statement: Differentiate between an apple and an orange
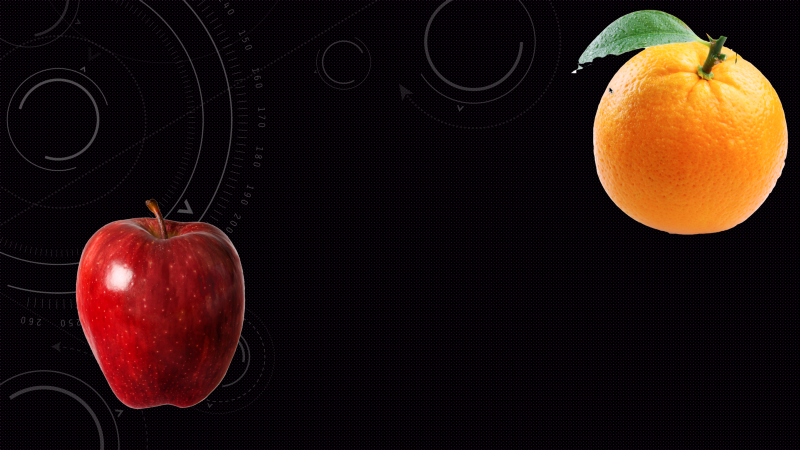
Let’s start with how you as a human will solve this problem and we will help our machine do the same via code. We will differentiate on certain characteristics like
- Shape
- Color
- Taste
- Texture
- Weight
If we look at these, they may seem ample enough to differentiate but the real world is not so well organized and is actually very messy and random. There may be a case when we are shown black and white images, this removes Color feature from the list. Similarly, many features may or may not be used depending on the scenario. It’s very important to take a step back and think about features that we choose to make conclusions. They should not be very specific or abstract.
Let’s suppose we take Weight and Texture as features for detection in our case. The next step is to gather data for some existing cases.

The overall steps that we will follow to train our machine is as follows
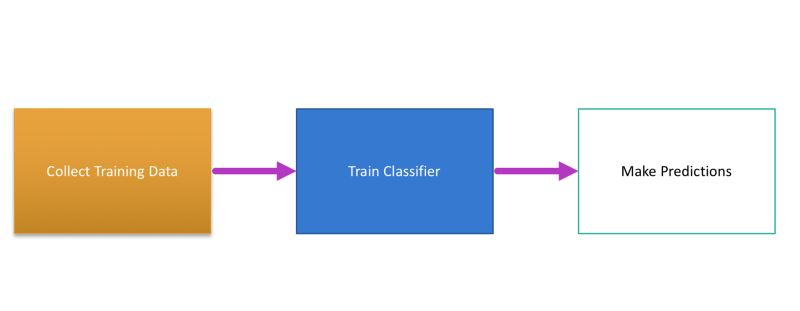
We are done with the first step of collecting the data which in most cases can be somewhat a manual process. Now for the second step of training our machines, we will use classifiers. For now thing classifiers just as functions.
Getting to the code now. We will be using python and its libraries for this tutorial
Let’s talk line by linefrom sklearn import tree
sklearn is an open-source library for python. (More on that later)
Features are the feature sets we decided to use for classification and Labels are the final outcome of classification, in our case it can be either apple or orange . Before moving further and executing this code we will change the code a bit and change classification and labels objects to 0 and 1 . After all dealing with numbers is much easier and faster than dealing with strings.
so we will changefeatures = [[140, "smooth"], [130, "smooth"], [150, "bumpy"], [170, "bumpy"]]//tofeatures = [[140, "1"], [130, "1"], [150, "0"], [170, "0"]]// replacing smooth with 1 and bumpy with 0// and
labels = ["apple", "apple", "orange", "orange"]//tolabels = ["0", "0", "1", "1"]// changing apple with 0 and orange with 1
Now the code becomes
For now, consider DecisionTreeClassifier() as an existing classifier provided by tree from sklearn which has a function fit() to train data. It takes features and labels as input. So we can input all the training data that is available to us to the classifier that we just used. All the data fed to the system is called training data. Now to test the data for a unique value we must make sure that the testing data is not part of the training data. (If we try to predict for data from training data set, it’s ought to give the right result and that is not intelligence)
Now when we predict for two inputsprint (clf.predict([[130,1]]))
print (clf.predict([[160,0]]))
We get results as apple and orange respectively which is correct although the data we predicted for is not a part of the original training data set, which makes our system intelligent right? Not absolutely but that’s a start, congrats for writing your Hello World for machine learning.
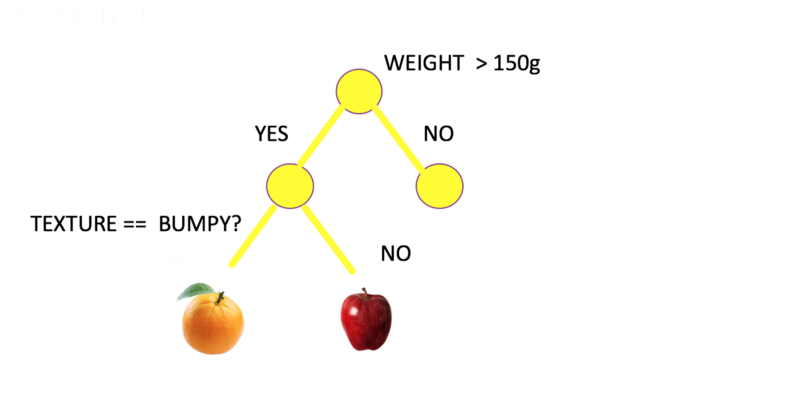
Level Up !!!
Now let’s solve another classic problem with more insights to the code
Problem statement: Differentiate between different species of Iris flower

There are three species of Iris flower namely Iris setosa, Iris virginica and Iris versicolor. The classification is done on the basis of four features which are petal length, petal width, sepal length and sepal width. If you click on this link you can see the data set for 50 flowers of each type.
So for solving this problem too, we will follow the approach of collecting data, training the classifier and then predicting a label for the flower. So let’s talk a bit more about classifiers now.
Classifiers
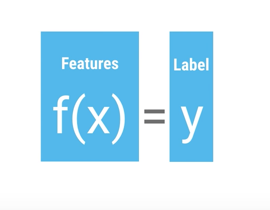
If we think about classifiers from a generic level they will look like a function written belowdef someClassifier(features):
# do some logic and magic here
return label
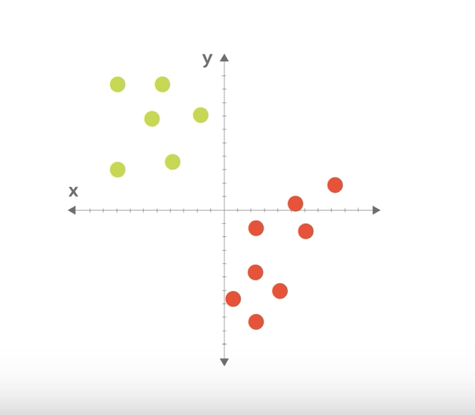
As in above image its easy to decide the dividing line by drawing a straight line, as we move more close to real-life examples of machine learning, deciding the mathematical line of truth becomes more difficult
Now coming back to the Iris problem, here is how the starting code will look like. Iris is a classic example so its data is available by default in sklearn library. In this code, we have just loaded the iris data using load_iris() and looped around all data to print
Moving forward with the code no , we have now included another very famous and useful library from python called numpy. It gives you more power to create arrays and list.
If we walk line by line through the code now, after loading data on line 6 . I have created an array for test_idx which holds the [0,50,100] which are actually indexes for the first values of all three types of flowers
0–49 : setosa
50–99 : versicolor
100–149 : virginica
Since test data should not be part of training data we delete that from train_target and train_data in lines 10 and 11.
Then we create test_data and test_target for testing in lines 15 and 16 using the test_idx, i.e our test data contains three flowers, one of each type
Now like before, we use DecisionTreeClassifier() at line 19 and 20 to train for the data and then check the result for test data at line 22 and 23.
And bam ! we get correct results.
As you saw we again used an existing classifier called DecisionTreeClassifier(), there are many such mathematical classifiers which are available in libraries and which one to choose depends upon our requirement and understanding of the problem. But say for some case we need to modify an existing classifier or better write our own classifier. So let’s get going and write our own classifier
Writing own classifiers
At first look, the code below may look scary to people who are new to python but don’t worry look line by line. Python is very easy to understand and code written in python is really close to poetry. Explaining itself.
Let’s start from line number 31. Following few lines will look familiar if you have followed this post till now. We have imported data for iris. Now on lines 37 and 38, we assign data and target for the training set.
In line 42, we simply divide the data into two parts with train and test values, by specifying size = 0.5 we simply mean we need 50% of data for each (x and y)x_train, x_test, y_train, y_test = train_test_split(x, y , test_size = .5)
If you look at line 44 and 47–48, I have commented out classifiers, namely DecisionTreeClassifier() and KneighborsClassifier() . If we uncomment either of these and use it instead of line 45 (where I have used my own classifier) it will still work and maybe with better accuracy too. So now I will write about my classifier which I named BareBonesKNN() . Like other classifiers it has to have a fit() method for training and a predict() method for predicting the result.
So I have defined a class called BareBonesKNN() with 3 methods — fit, predict and closest.
fit (training_data) method
It takes the training data for both X and Y and for now simply assigns it to local scope.
predict(test_data) method
Now for predicting we pass the test data to predict function and simply starts with a blank array for prediction and then loops through all the values in the test_data. and passes each value in test_data to the closest method which returns a label for it and the returned label is appended to the blank array of predictions.
closest(scope, value_of_individual_test_data)
The closest function starts by considering euclidean distance of current test_data_value with the first value of training_data as best distance and index of that data as best index for that value. Now we simply loop through all the values in the training_data to check if there is any euclidean distance lesser than what we started with, if yes we replace it. Finally, at the end, we return the value and label for the test_data.
So, in this case, we considered euclidean distance as the mathematical source for drawing the truth line. If we go further and try to calculate the accuracy it will be only around 70–75% compared to 90–95% of what we were getting for DecisionTreeClassifier and KNeighborClassifier. The reason is that we took a very simple way to build our model over euclidean line separation. If we fine- tune our algorithm more and look out for more specific separation we can fine- tune the accuracy.
For people who have started ML lately, this may seem like a bit overwhelming but I will try to write along the lines how I have started and how I am moving in upcoming write-ups.
Update: Resources for this blog can be found on GitHub here.
Recap of what we did in this session
Episode — 1
- What is Machine Learning?
- The inspiration for machine learning
- Apple and Orange classification example
- Iris flower dataset classical example
- Classifiers
- Pipelines
- DecisionTreeClassifier
- KNeighborClassifier
- Writing Own Classifiers
Some of the things that we will talk about in Episode 2
- TensorFlow
- Image classifier using TensorFlow
- Using TF.Learn
